Tried Throwing
I forgot to get a picture of myself on the wheel but the most challenging thing I found while throwing was centering the clay piece and making it stick to the kick wheel. Every time I put my hands on it and spun it, the clay would get loose and uncentered.
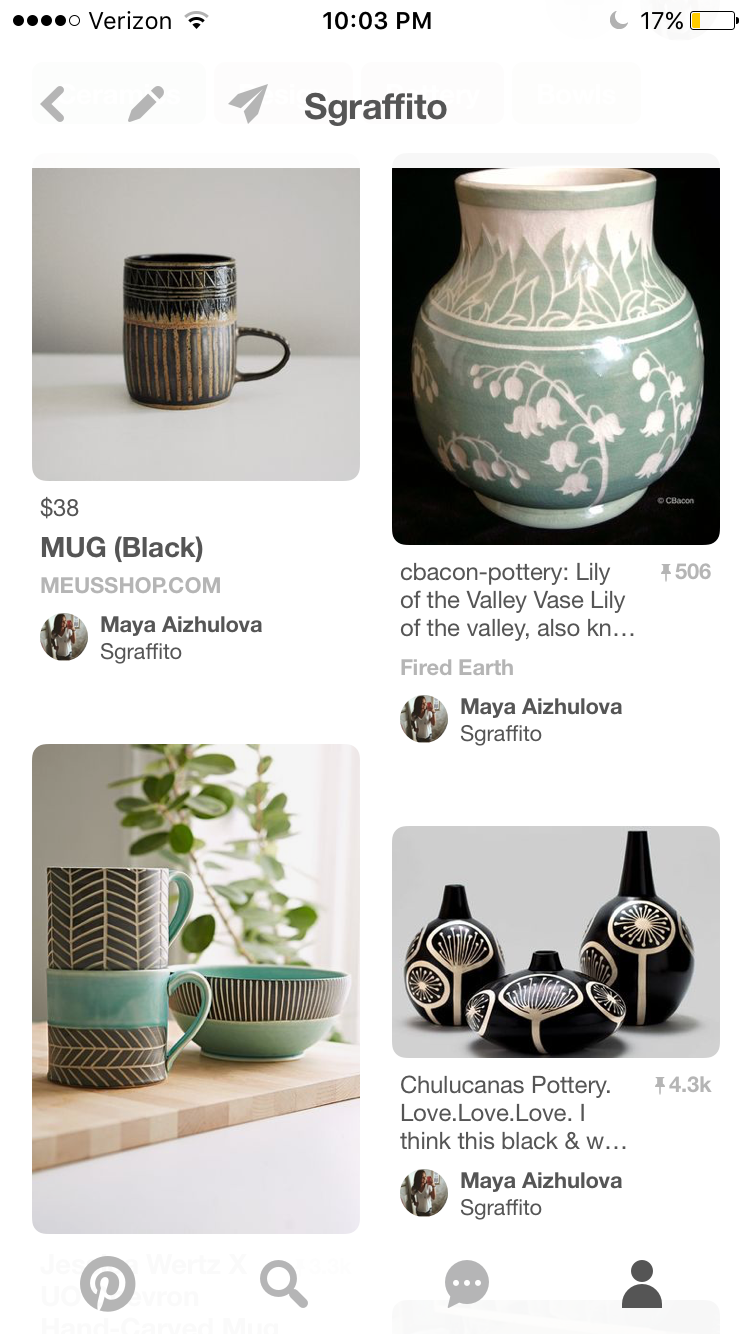
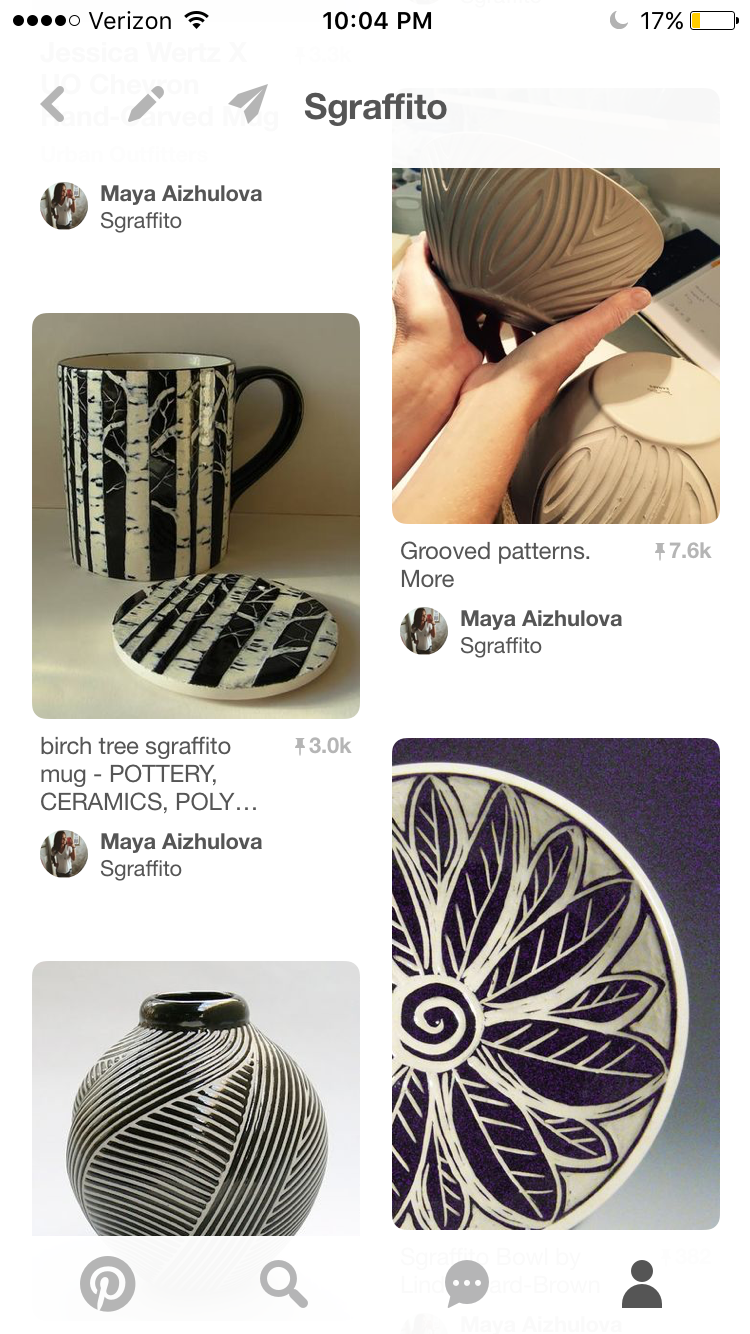
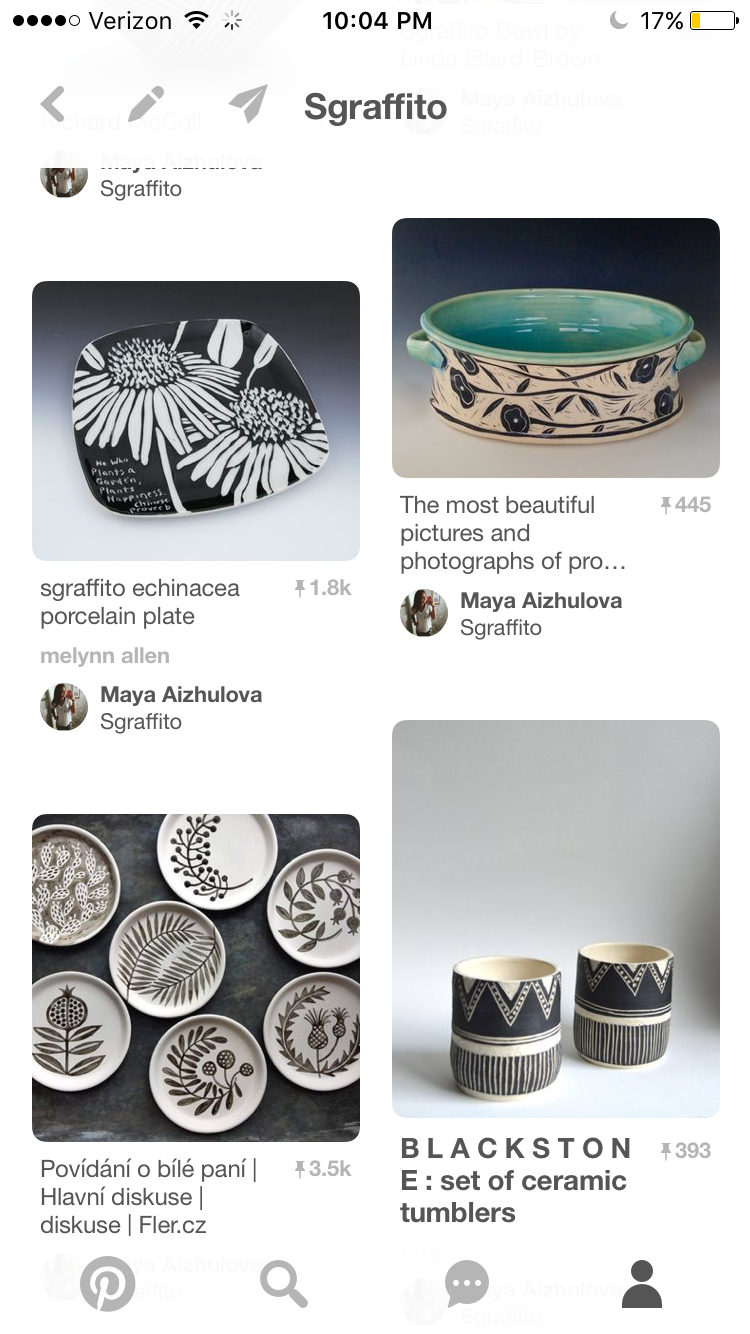
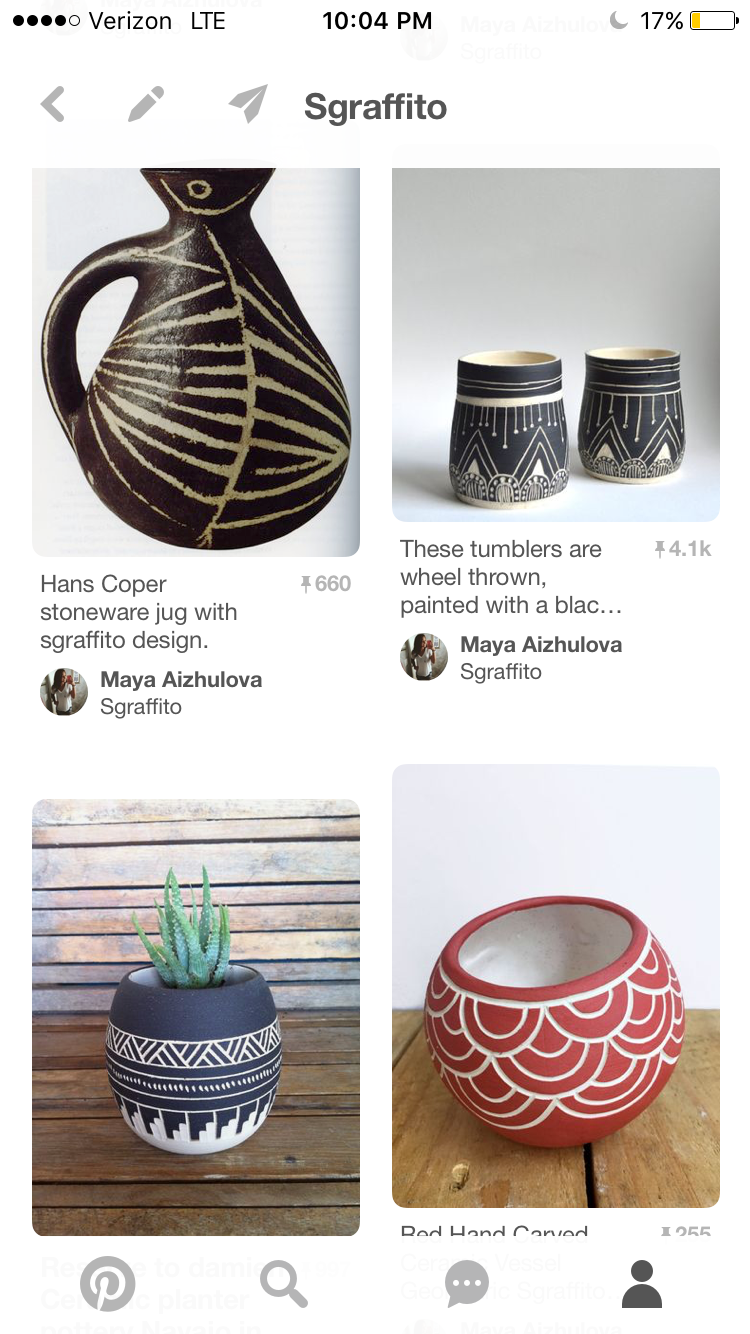
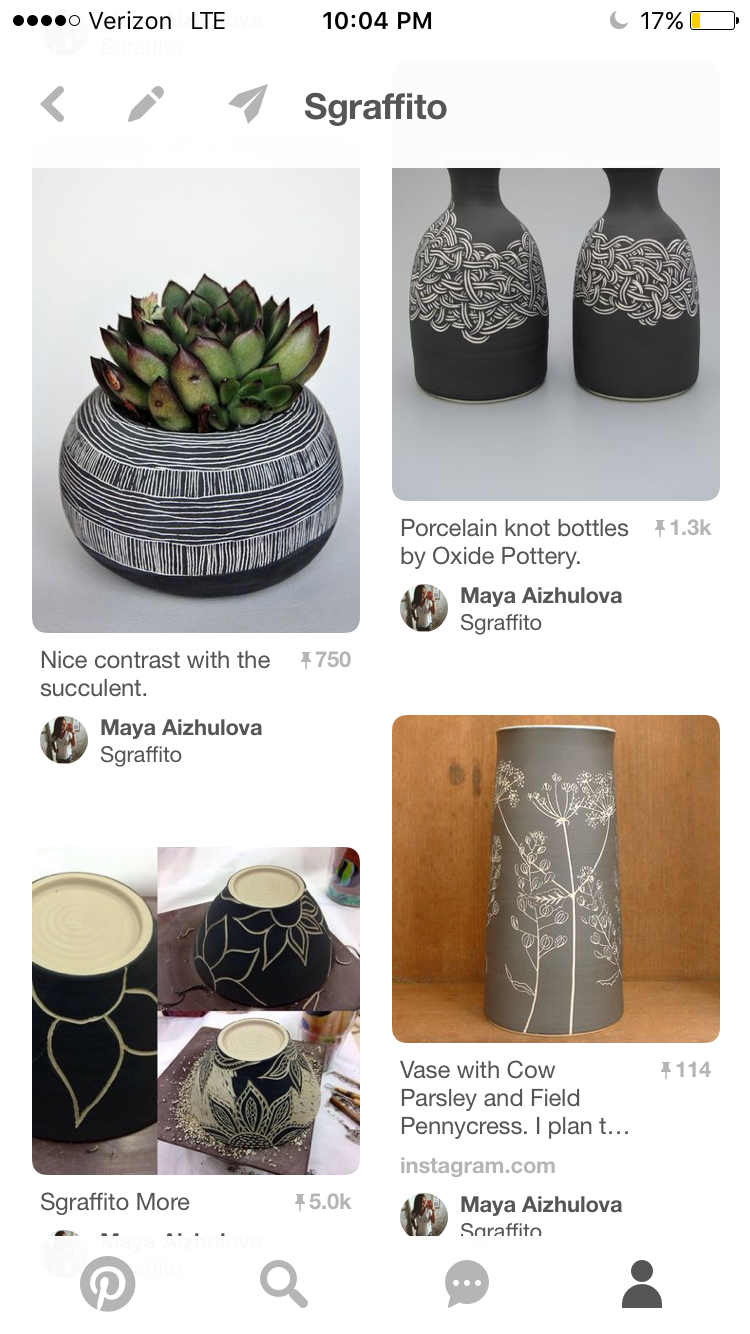
Sgraffito
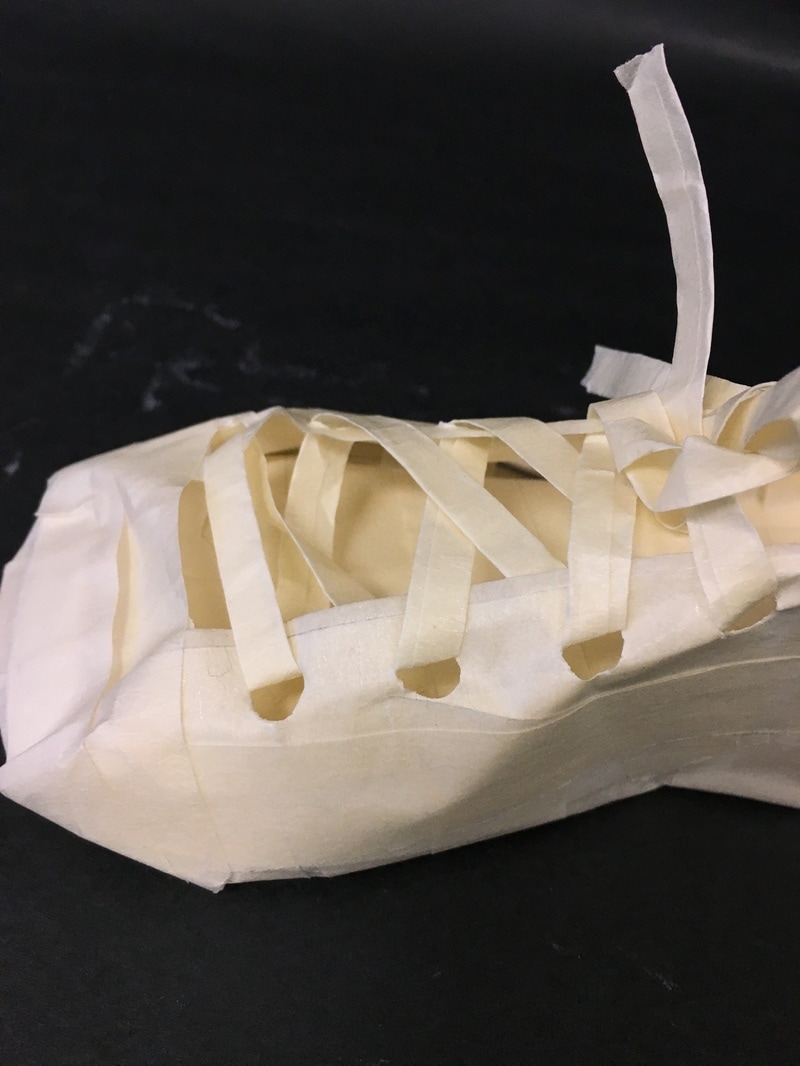
Masking Tape Shoe
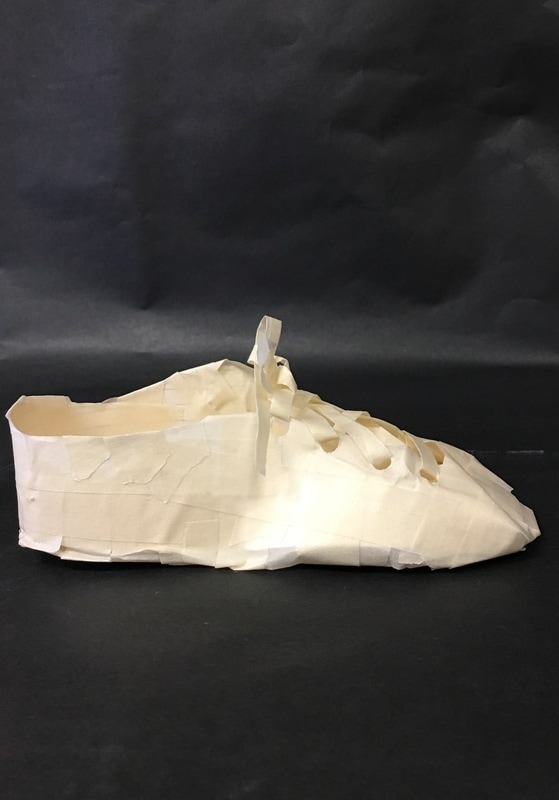

1. The process that it took to make this masking tapes shoe was taking an index card and cutting and aligning it to fit the shape of the shoe. Then using masking tape to secure the different edges. I repeated these steps a couple of times until I finished creating the shoe.
2. I think my shoe laces came out to be the most successful because i was able to make the laces pretty easily and put it through the hole punched holes of the shoe.
3. It was unsuccessful in the way that the bottom of the shoe was very weak and the tape was not able to uphold the shoe. I would change it by adding more tape to the shoe and making it more sturdy.
Unconventional Materials Challenge
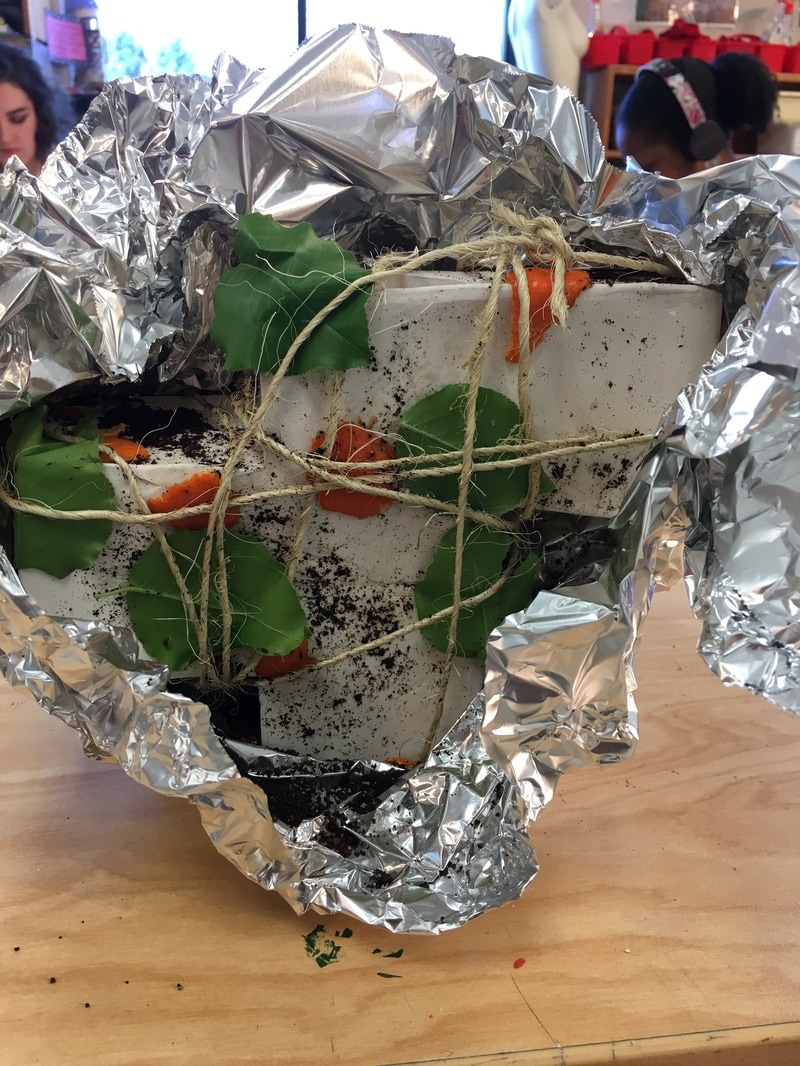
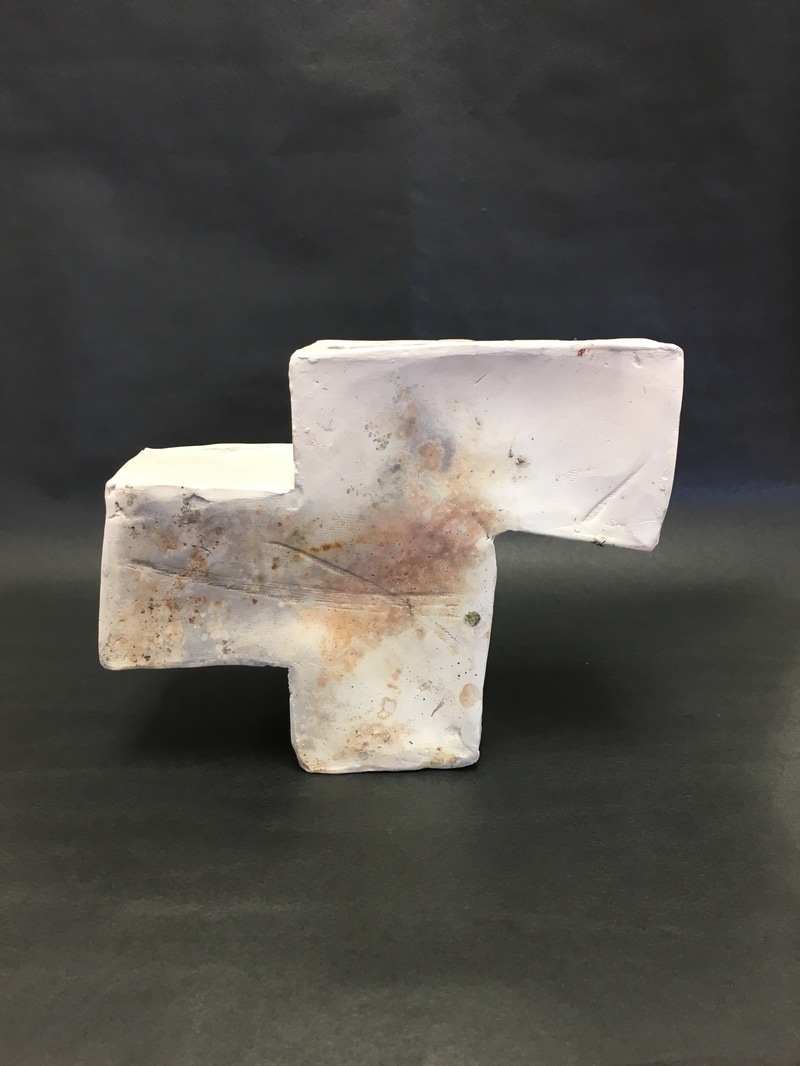
Pit fired ceramics
|
|
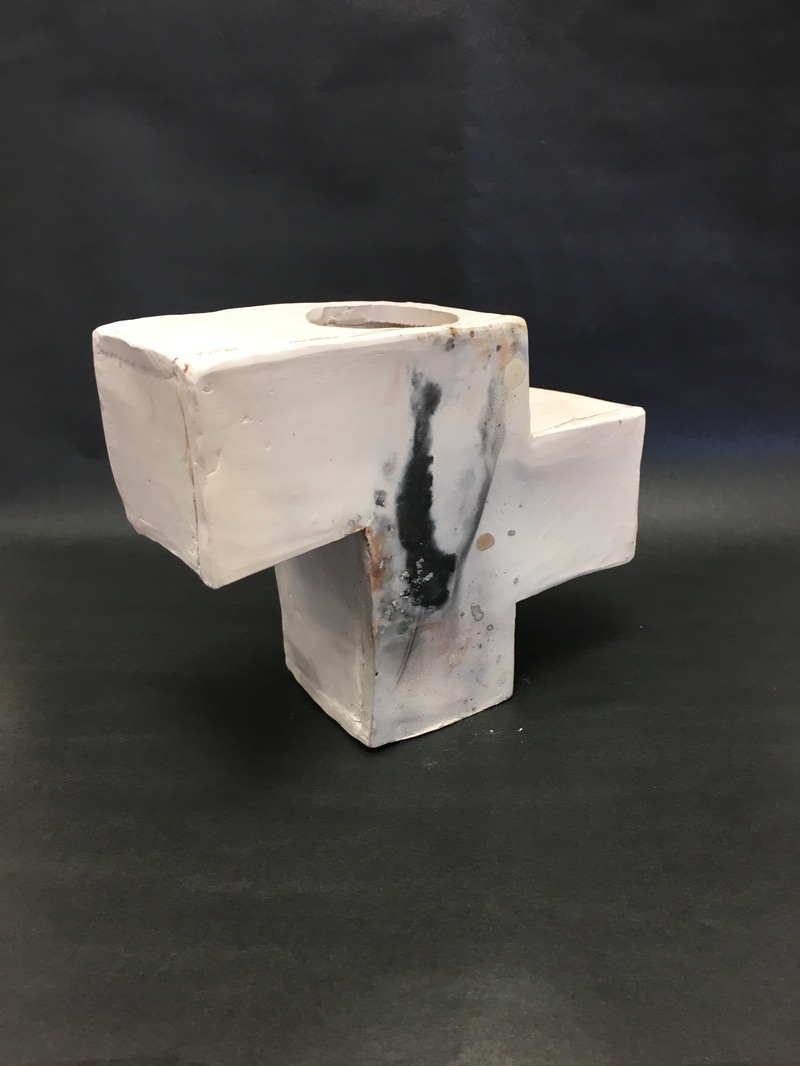
1. The process for pit fired ceramics and saggars consists of 3 steps; throwing the pots, terra-sigillata, and pit firing. To start off you want to sculpt your piece and make sure it dries to become leather hard. This is necessary in order for the it be ready for the final burnishing. When the piece is bone dry, spray on terra-sigillata to ensure durability. Finally, load the piece into a pit with combustible materials such as sawdust or newspaper. These materials will change the colors of the piece which is determined by how fast or slow the piece is being heated. In the end, make sure to polish and clean it up!
|
2. I think this project was kind of successful. I feel like I could have smoothed out all the sides on the piece a bit more to make it even at every angle. Also, when placing the combustible materials, the firing was not so successful because I was not able to make the pieces fit tightly against the piece since the twine fit around the piece pretty awkwardly.
|
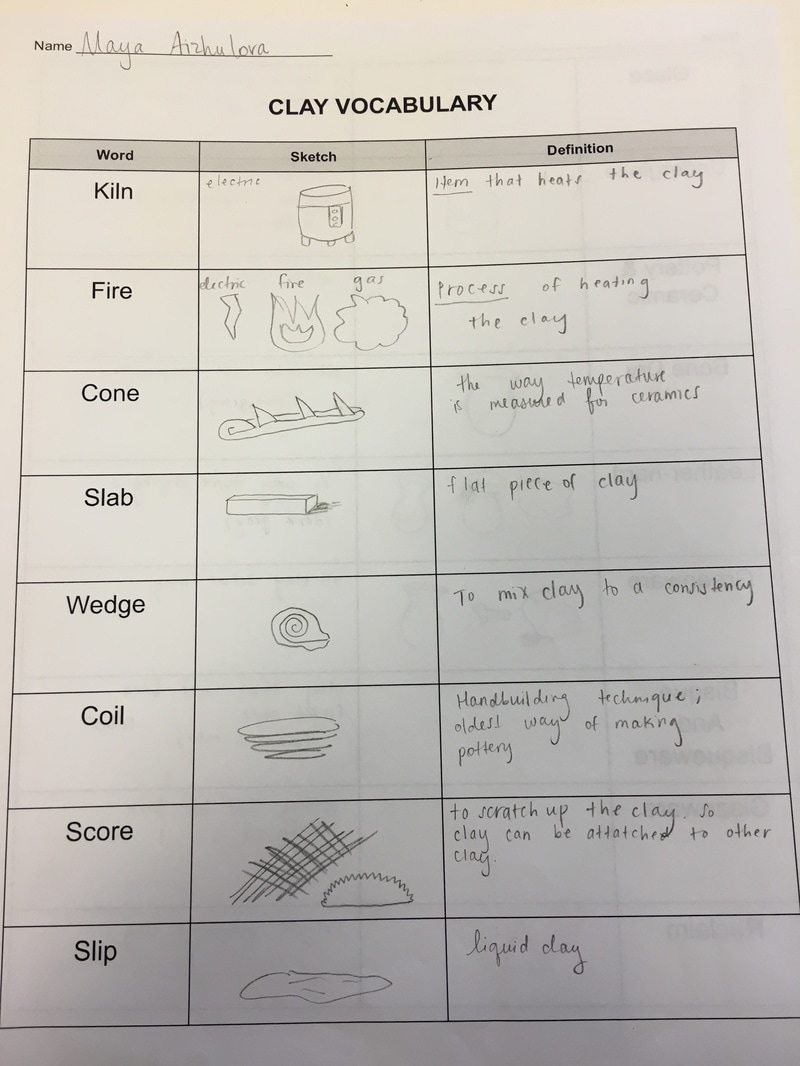
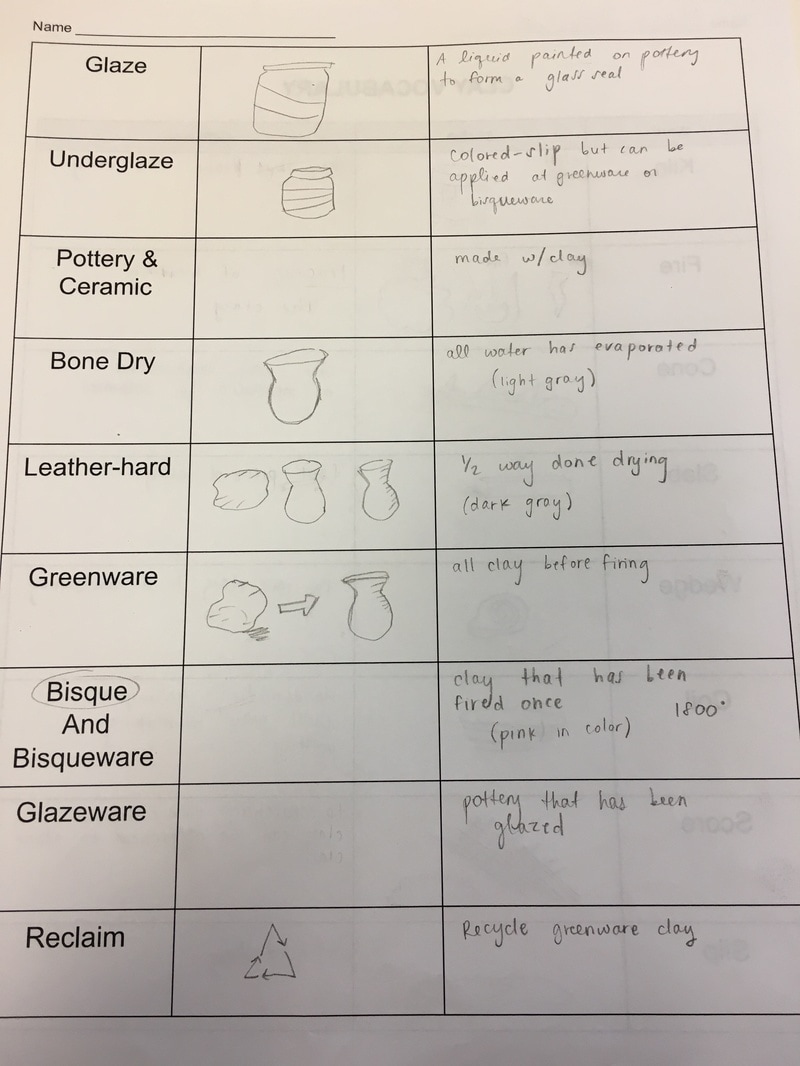
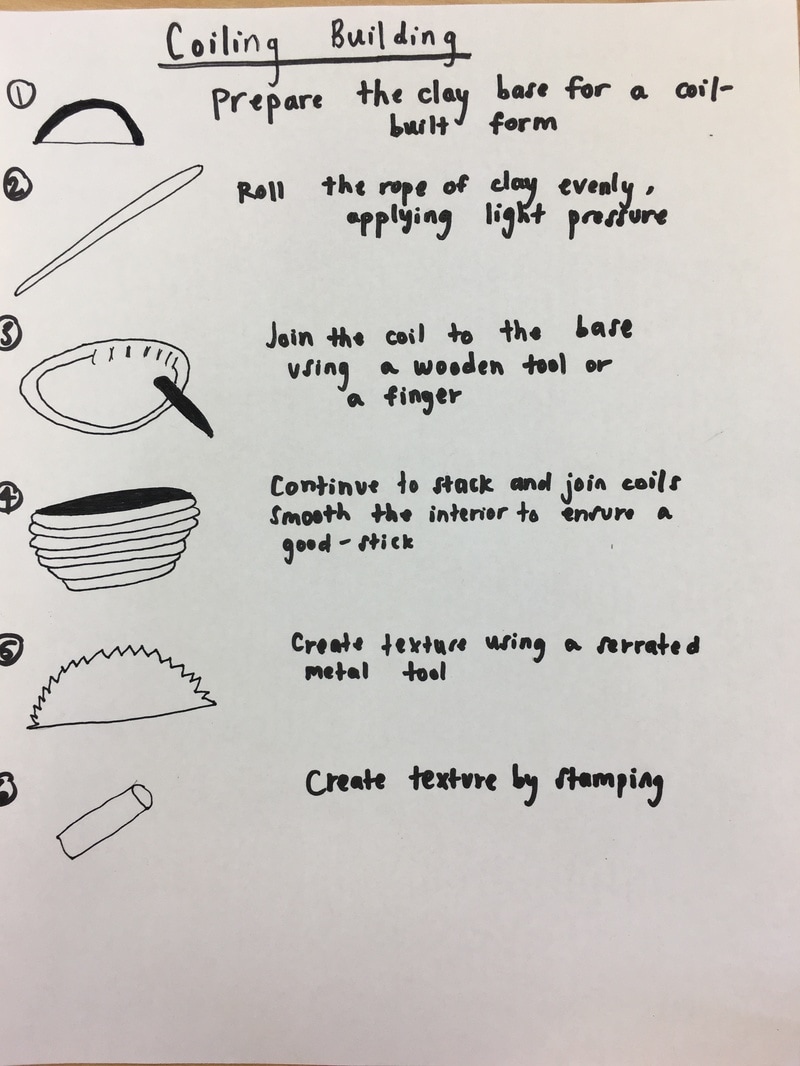
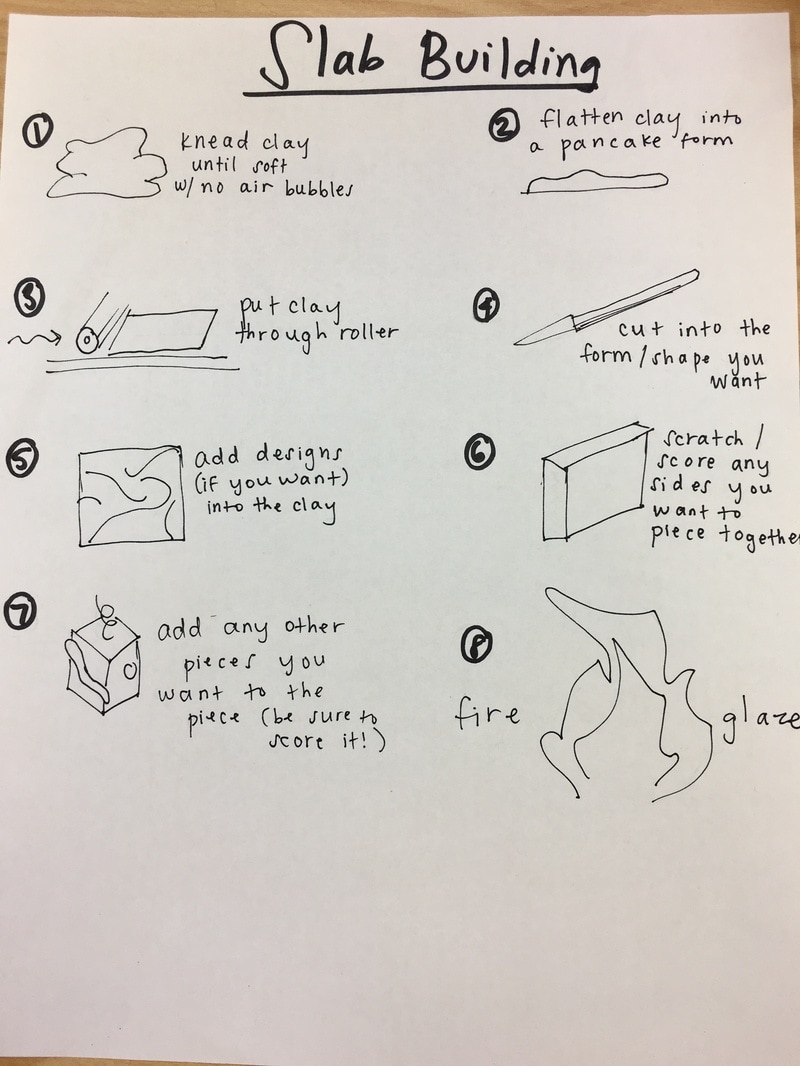
Clay Vocab
Learning Techniques
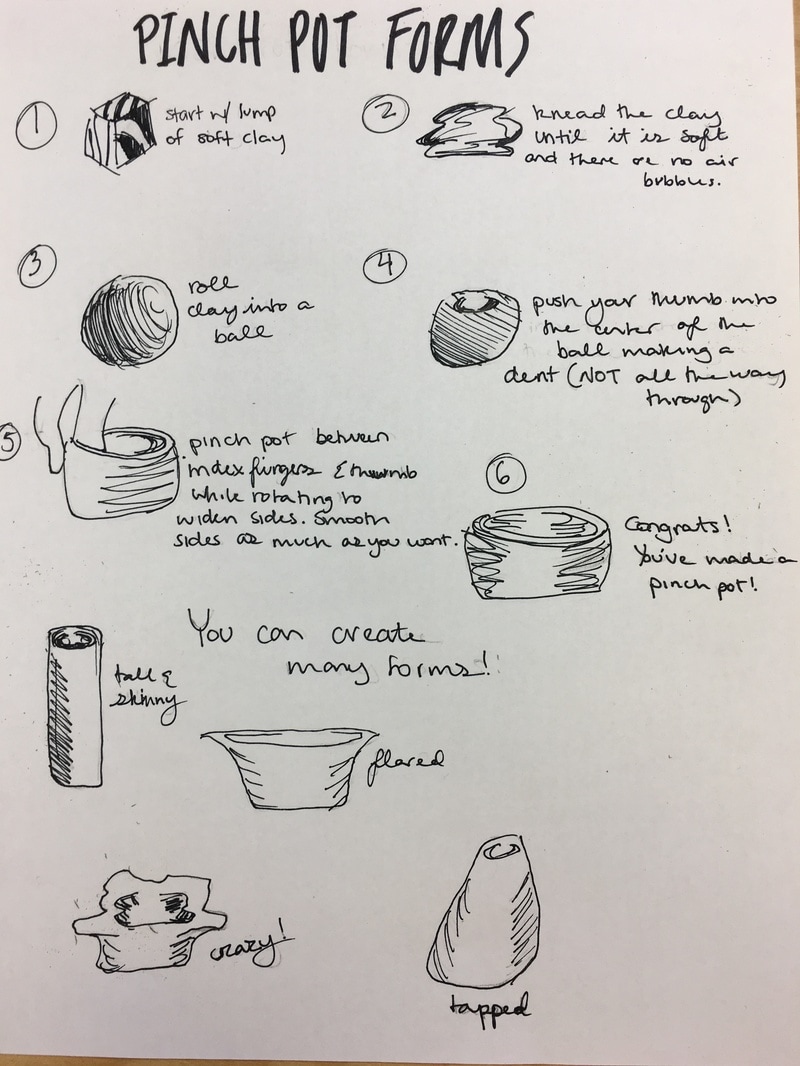
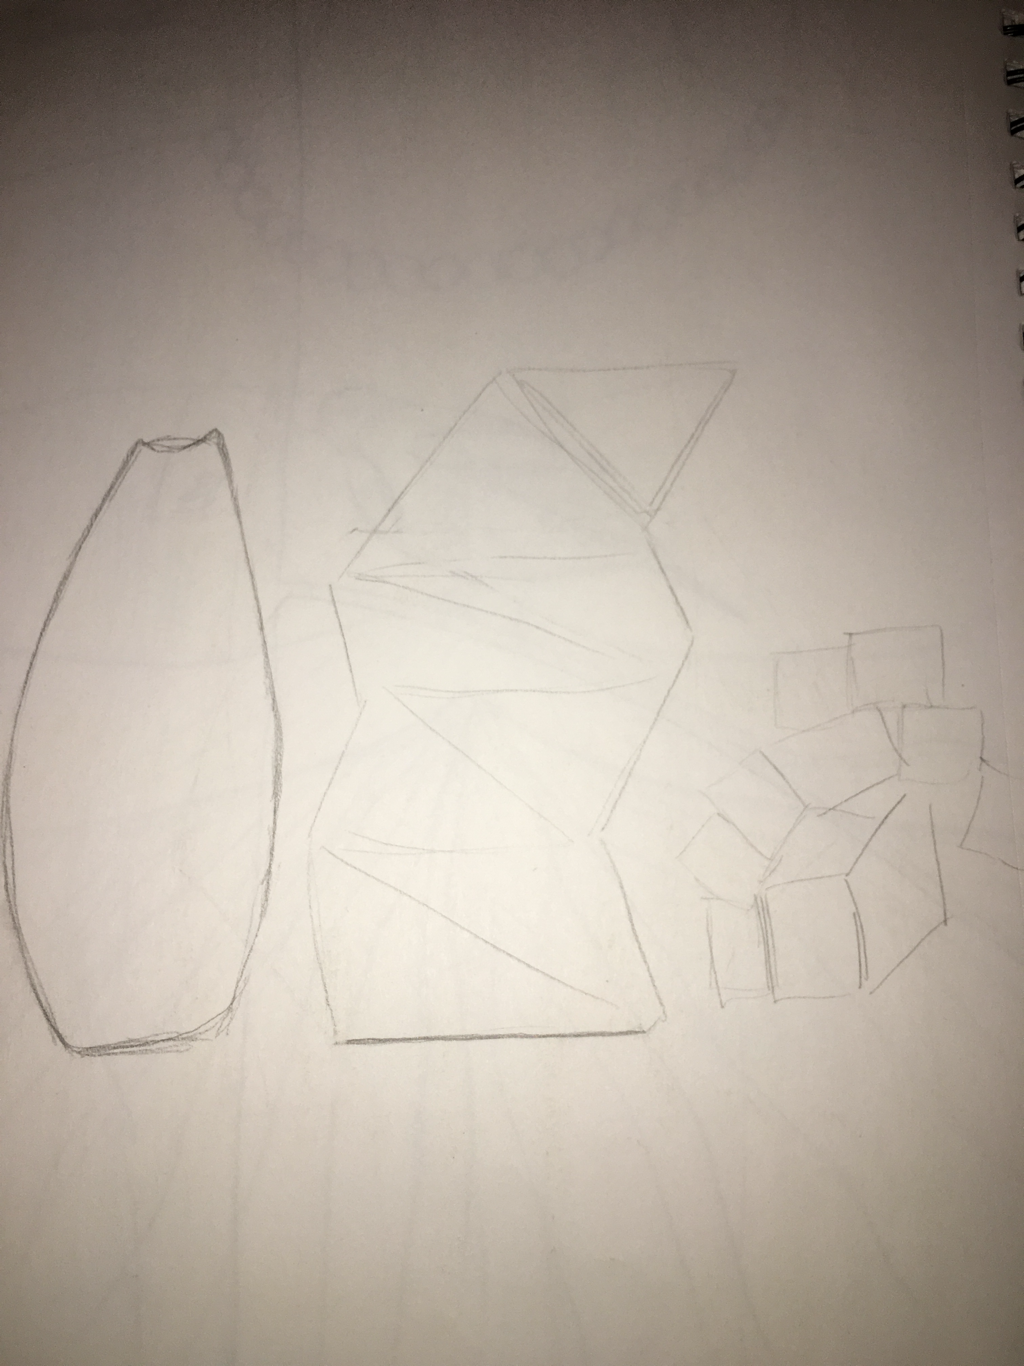
1. I will use the pinch pot technique for my pit fire piece because I feel like I won't be able to keep the separate pieces of clay attached to each other if I were to use coiling building or slab building.
2. The work was divided pretty evenly. Isabelle did the pinch pot forms page, I did the coiling building page, and Isabelle wrote the slab building in pencil while I outlined it in marker.
2. The work was divided pretty evenly. Isabelle did the pinch pot forms page, I did the coiling building page, and Isabelle wrote the slab building in pencil while I outlined it in marker.
Clay relief
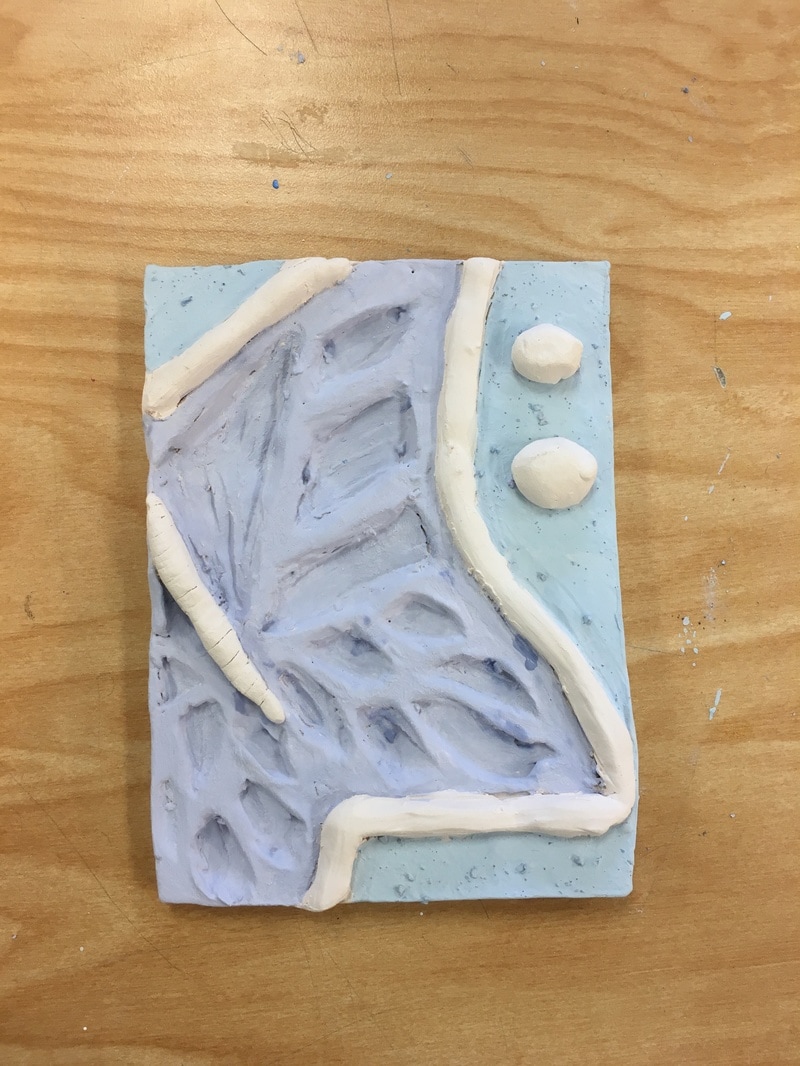
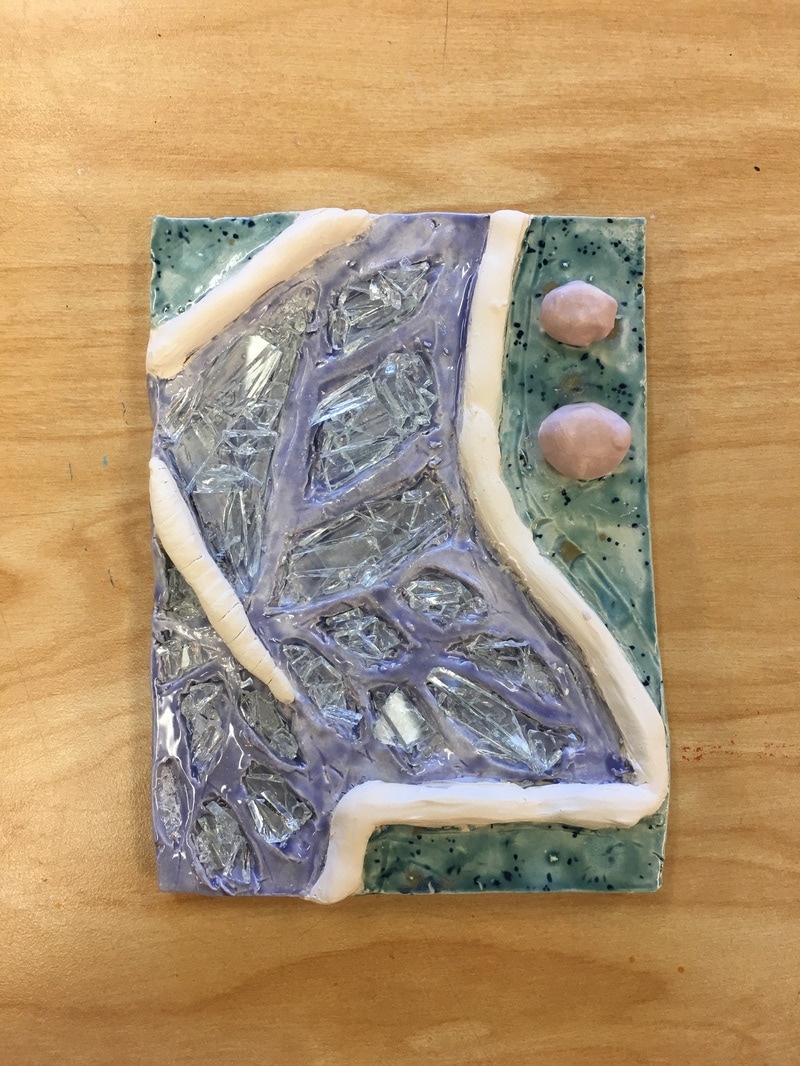
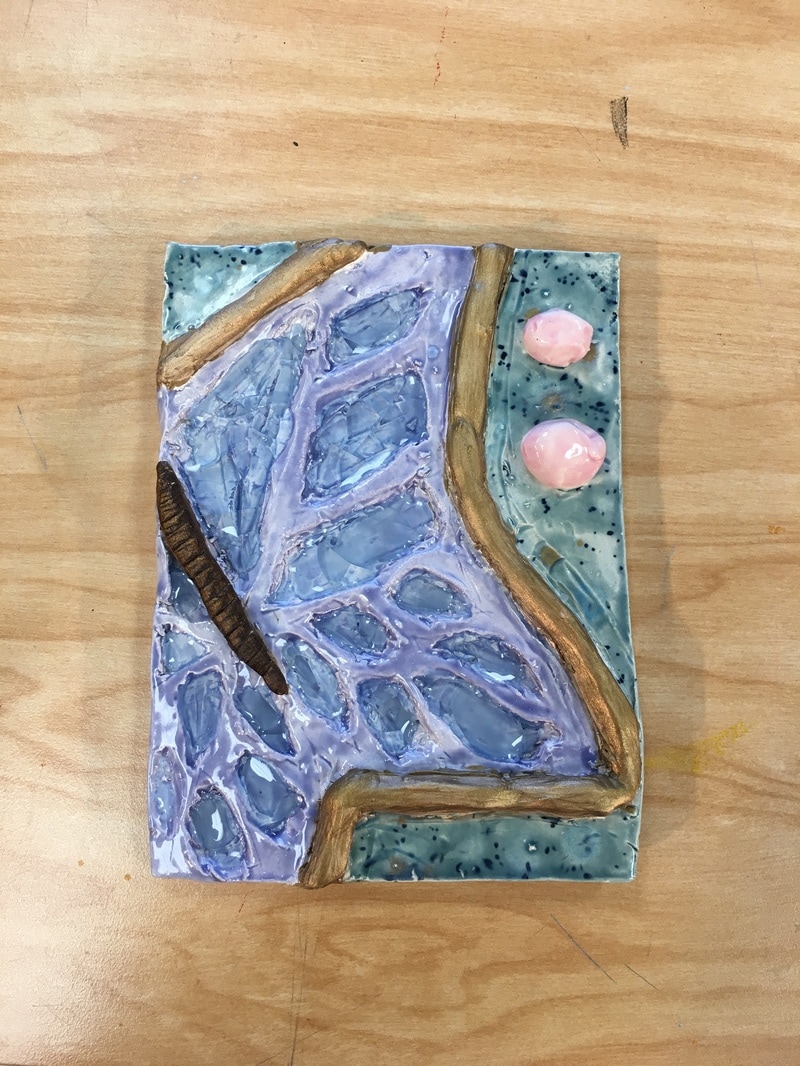
1. I found that the way the glass fit in the slits of the butterfly's wings was successful because I was nervous that I was going to be unable to fit the tiny pieces.
2. If I were to do this again, I would have tried to smoothed out the clay more before firing it. After firing the clay, the texture came out rigid and rough.
3. The subject for this piece was a butterfly in nature. The blue in the background represents the sky and the two spheres that I added bring more detail to the piece.
Cardboard Relief

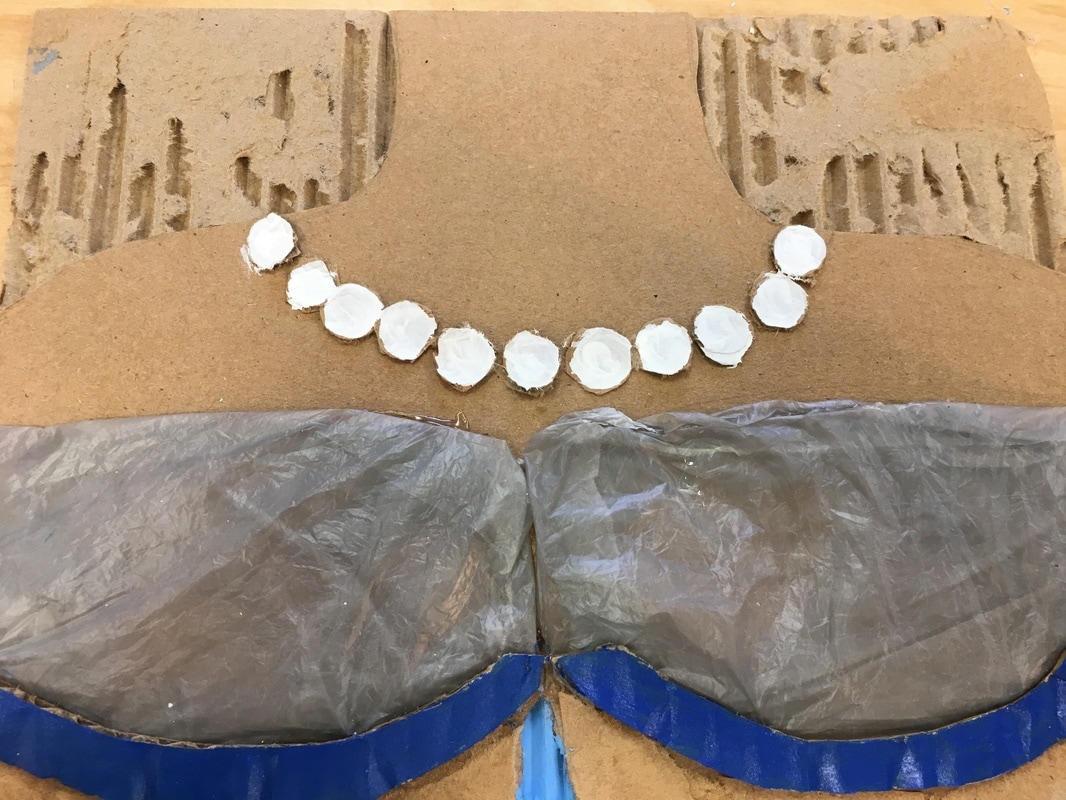
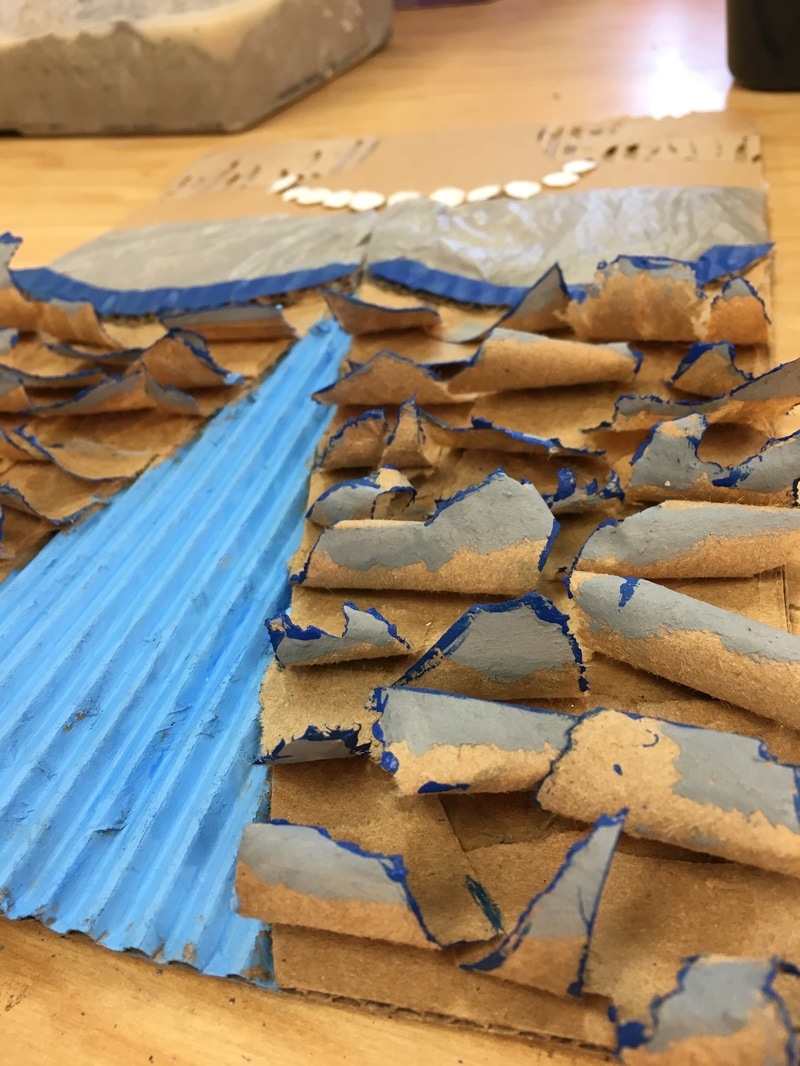
1. One thing I found successful about my cardboard piece is the shape of the ruffles on the dress. I think I was able to curl the cardboard bits enough to make it look more 3D.
2. One thing I might have changed if I were to do it again is painting each piece of the dress before pasting it onto the cardboard in order to make it more colorful and lively.
3. My subject for this piece was an outfit that a lady would wear to a ball. I incorporated beads to make the outfit look more fancy and classy. I added plastic bags for the design on the chest to add more design to the dress.
Inspired Artist post
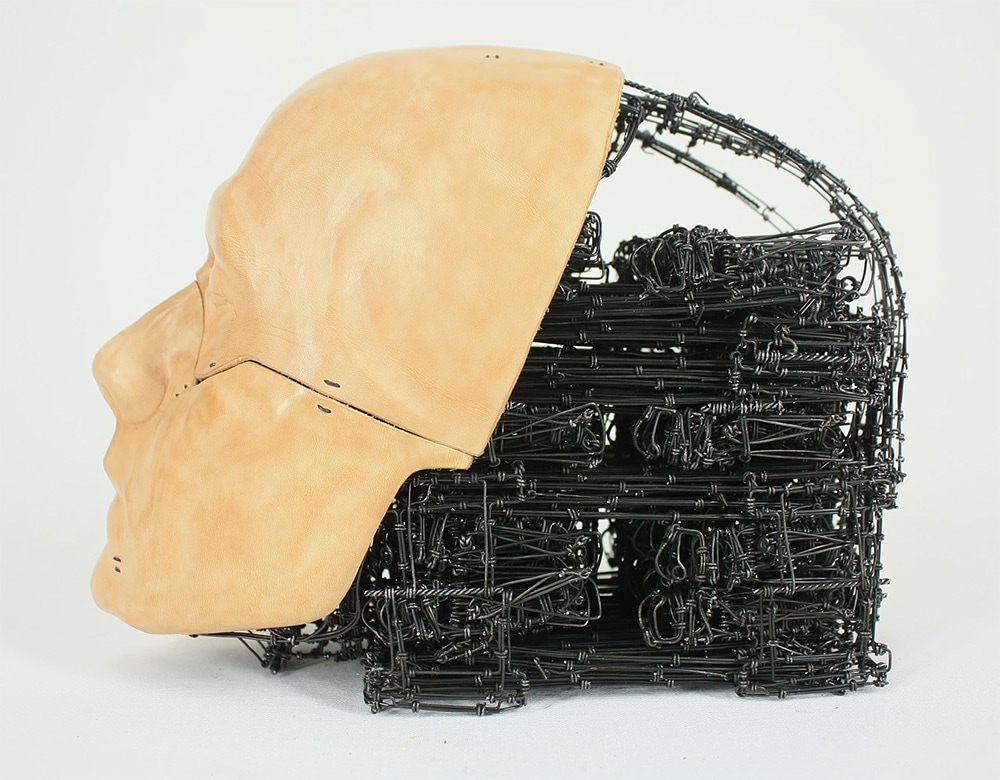
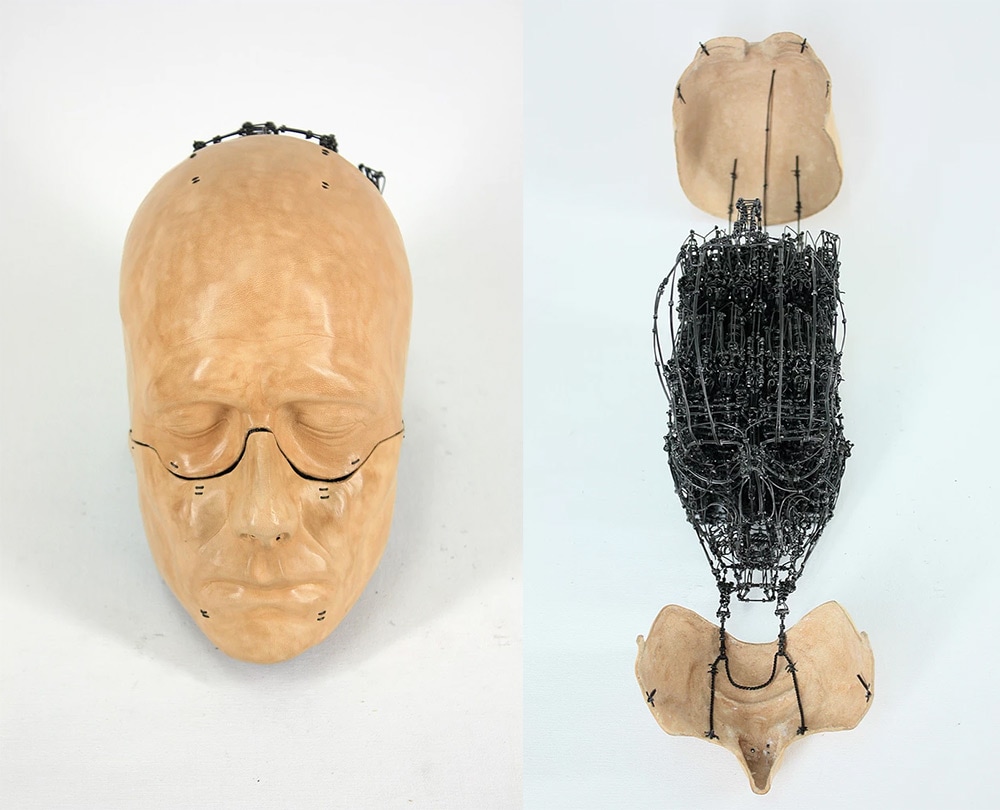
Claude-Olivier Guay was born in La Sarre, Quebec in 1988. He completed his Bachelor’s degree in Visual and media arts at the UQAM in 2013. His work focuses on the body’s remnant notions and transformations. His piece called Cénotaphe appears to be just a bundle of wires underneath a mask. Although when the sculpture unfolds, the inner framework transforms into carefully folded locusts. The sculpture is currently located in Quebec City. More about Guay can be found on his site: https://www.claudeolivierguay.com/
Guay’s work is inspiring to me because the piece is able to come to life and reveal all the entities of the brain. Through its acts of motions, the sculpture is also able to portray the swarming phase that locusts partake in. Locusts are usually solitary, but under certain circumstances become more abundant and change their behavior and habits in the same way that the brain does. For this reason, I find Guay’s sculpture truly unique and inspiring.
Guay’s work is inspiring to me because the piece is able to come to life and reveal all the entities of the brain. Through its acts of motions, the sculpture is also able to portray the swarming phase that locusts partake in. Locusts are usually solitary, but under certain circumstances become more abundant and change their behavior and habits in the same way that the brain does. For this reason, I find Guay’s sculpture truly unique and inspiring.
Texture mini Post
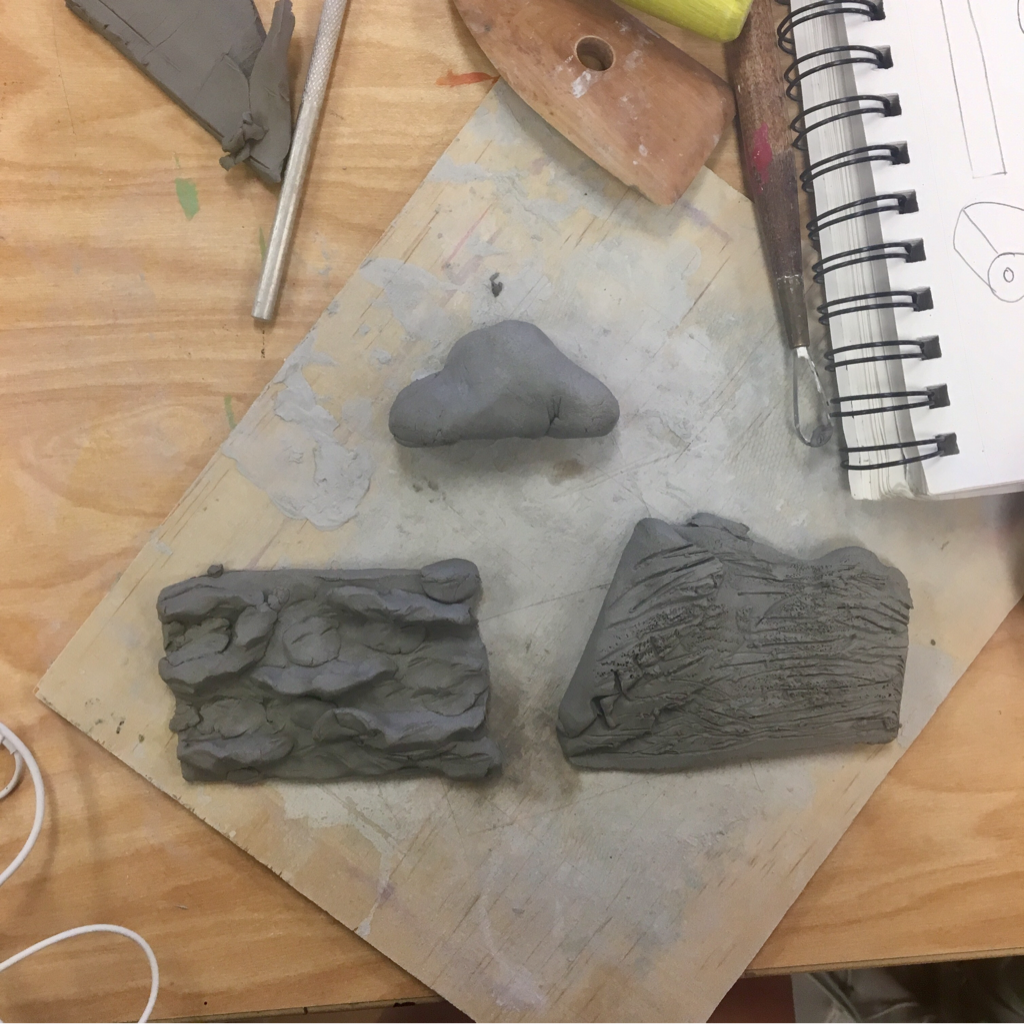
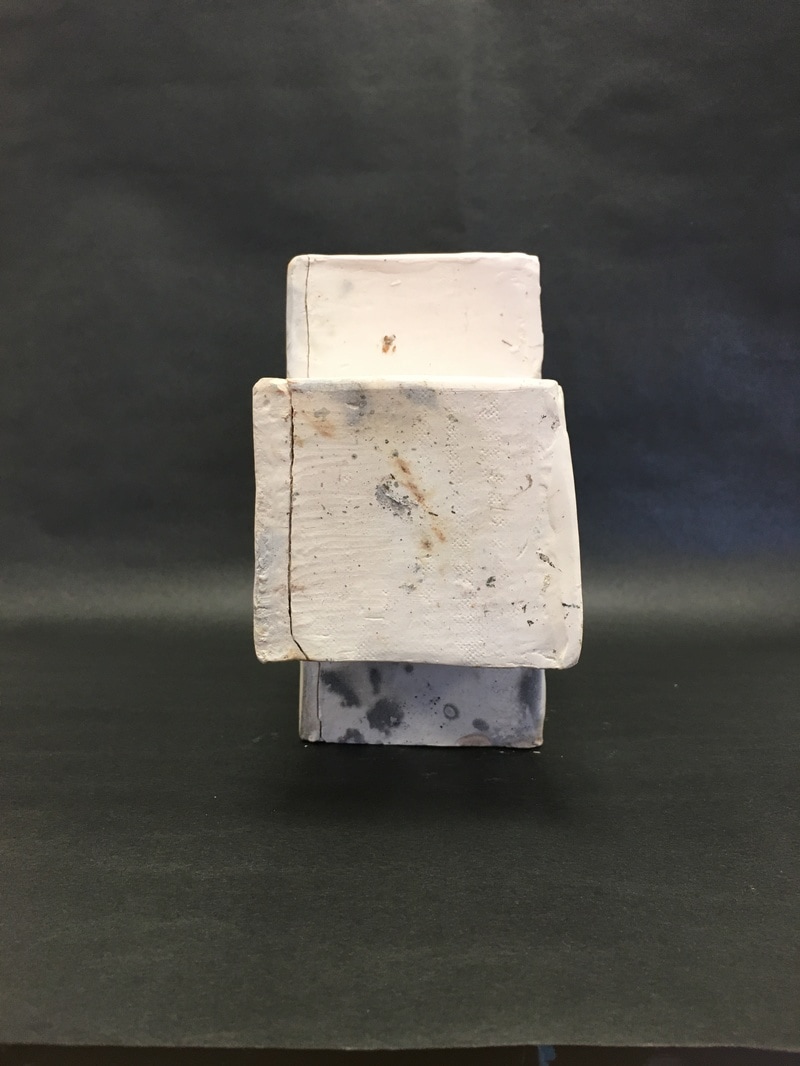
My partner smashed the clay pieces before I was able to take three individual photos of each one.
What did I find most challenging about these 3 textures?
Cloud- I found the cloud texture one challenging because me and my partner had to figure out how to make it textured. The shape of the cloud itself was easy to sculpt but to make it come to life was the most difficult part.
Rock- The most challenging part about the rock texture was to make sure the rock would stick when my partner and I scored and slipped it. Also we had to make sure that we didn't damage the shape of the other rocks while attaching more onto the slab.
Fur- The fur texture slab on the bottom right was the easiest to make, in my opinion, since we just cut slits in the clay. The most challenging part was being able to carve all the streaks in a certain direction.
